Text-to-image is powerful, but it only gets you so far. The moment you introduce a source image into your workflow — something to guide the composition, style, or subject — you unlock a completely different level of creative control. That's what image-to-image (img2img) is all about, and with Flux in ComfyUI, the results are better than they've ever been.
This guide covers everything: what image-to-image actually does, the key settings that control the output, real-world use cases, and a step-by-step setup in ComfyUI using Flux Dev.
What Is Image-to-Image?
Image-to-image generation uses an existing image as a starting point alongside your text prompt. Instead of generating from pure noise, the model begins with a noisy version of your source image and refines it toward your prompt description.
The practical result: the AI output inherits elements of your original image — composition, subject shape, lighting, color palette — while the text prompt guides the style, mood, and details of the transformation. You control how much influence the source image has versus how freely the AI interprets the prompt.
What You Can Do With It
Take a photograph and reimagine it as an oil painting, a comic book panel, a watercolor, or any other aesthetic — while keeping the underlying composition intact.
Generate multiple images of the same character in different poses, outfits, or settings while maintaining recognizable visual consistency across the series.
Reimagine a photo of your pet as an astronaut, turn a vacation snapshot into surreal artwork, or transform a product photo into a rendered illustration.
Maintain a consistent visual style across a series of scenes by using each generated panel as the source image for the next, creating a coherent visual thread.
Pass a lower-quality or AI-generated image back through the model to add detail, fix artifacts, or refine areas that didn't come out quite right.
Take a product photo and generate styled marketing renders in different environments, lighting setups, or artistic treatments without a full photoshoot.
The Key Setting: Denoise Strength
The most important control in any img2img workflow is the denoise strength (sometimes called denoising strength or noise level). This single value determines how much the model can deviate from your source image.
- Low (0.1–0.3): Source image is almost entirely preserved. Only subtle texture, lighting, or detail changes occur. Good for refinement and minor adjustments.
- Medium (0.4–0.6): The composition and rough subject shape stay, but style, color, and details shift significantly toward the prompt. The sweet spot for most style transfers.
- High (0.7–0.85): The model takes significant creative liberties. Source image provides a loose structural guide only. Great for dramatic transformations.
- Very high (0.9–1.0): Almost identical to text-to-image. The source barely influences the output.
Setting Up Img2Img with Flux in ComfyUI
Open ComfyUI and load Flux Dev as your base model. Make sure you have the VAE loaded as well — Flux requires its own VAE file (ae.safetensors) to encode and decode images correctly.
Right-click the canvas → Add Node → Image → Load Image. This is where you drop in your source image. You can also use the Load Image from URL node if you're working with web images.
Connect your Load Image node to a VAE Encode node, then connect that to your sampler's latent_image input. This converts your source image into the latent space that Flux works in.
On your KSampler node, find the denoise parameter. Set it to your starting value — try 0.6 for a balanced style transfer. This is the main control you'll be adjusting between runs.
Describe the style, mood, or transformation you want in the positive prompt. Be specific — Flux follows detailed prompts well. Queue the generation and review the output. Adjust denoise strength up or down based on how much transformation occurred.
Combining Img2Img with LoRAs
Image-to-image becomes even more powerful when you add LoRAs to the mix. A style LoRA (trained on a specific artist or aesthetic) combined with a moderate denoise strength gives you precise control over exactly what kind of transformation happens — not just "make it look like a painting" but "make it look like this specific illustrator's work."
Similarly, a subject LoRA lets you inject a consistent character or face into variations of a scene while the img2img source provides the compositional starting point. This combination is the foundation of consistent character generation workflows.
Common Mistakes to Avoid
- Wrong image resolution: Resize your source image to match Flux's preferred resolution (1024×1024 or similar) before loading it. Mismatched aspect ratios cause distortion and composition drift.
- Prompt fighting the source: If your prompt describes something very different from the source image, you'll get an incoherent output at medium denoise. Either increase denoise to give the AI more freedom or align your prompt more closely with the source composition.
- Forgetting the VAE: Flux requires its own specific VAE. Using the wrong VAE produces washed-out, discolored, or garbled outputs. Always load
ae.safetensorsalongside Flux models. - Not experimenting with seeds: Same settings, different seeds — dramatically different results. Run 4–6 variations at the same denoise and prompt before deciding whether to change parameters.
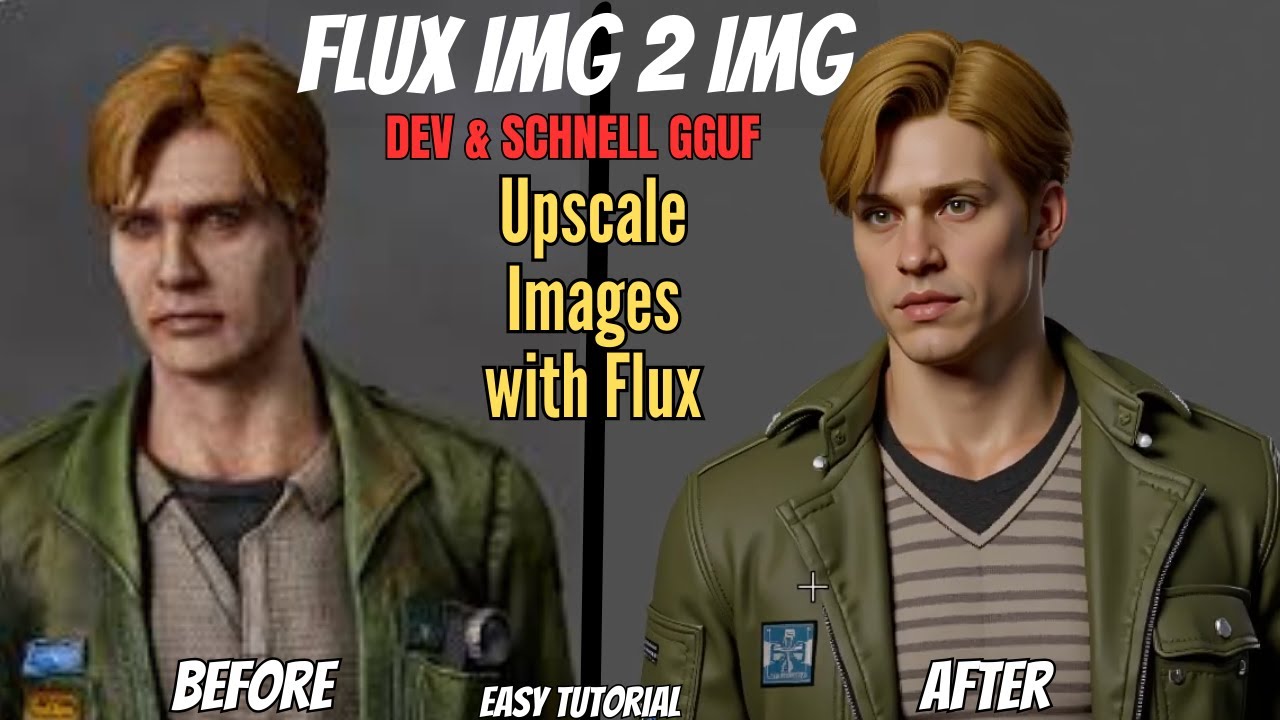
Watch the full video above for a hands-on walkthrough with real before-and-after examples showing exactly what different denoise values do to the same source image.
Ready to try this yourself?
Our one-click ComfyUI installer comes pre-configured with Flux workflows — img2img included. No setup headaches.